
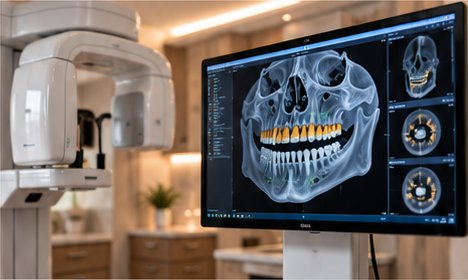
When replacing a missing tooth, planning matters. A dental implant needs to be placed in the right position to support a new tooth that looks natural and functions comfortably. At Montgomery Greene Dental, we use guided surgery for every dental implant we place. It is part of our commitment to careful, precise treatment, not an optional upgrade.
With digital scans and a custom-made surgical guide, we can plan the implant before surgery and use that plan to help guide its placement. Here is what the process looks like from a patient's perspective.
What is guided implant surgery?
Guided implant surgery uses a digital plan and a custom guide to help the dentist place an implant in its intended position. Think of the guide as a carefully fitted template made specifically for your mouth: it transfers the plan from the computer to your treatment.
This approach can improve the accuracy of placement, but it does not eliminate surgical risks or replace the dentist's experience and judgment.
Step 1: A CBCT 3D scan of your jaw
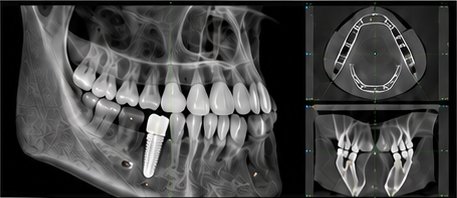
We start with a CBCT (cone beam computed tomography) scan. You stand still for a few seconds while the scanner rotates around your head, and we get a detailed 3D image of your jaw and skull. A CBCT uses a lower radiation dose than a typical medical CT scan.
Unlike a flat X-ray, the 3D image shows how tall, wide and dense your bone is, and where nearby structures sit: the nerve that runs through the lower jaw, the sinuses above the upper back teeth, and the roots of neighboring teeth. We also assess whether the jawbone can support an implant, or whether additional treatment, such as bone grafting, may be needed.
Step 2: An iTero digital scan of your teeth and gums
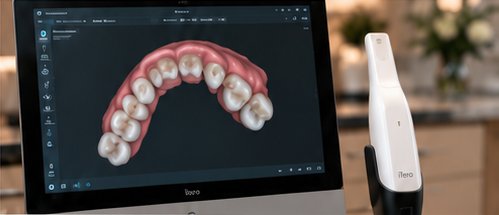
Next, we take an iTero intraoral scan. A small wand captures the shape of your teeth and gums and builds a precise 3D digital model in a few minutes, without the need for traditional messy impressions in many cases.
Step 3: We merge the two scans
Each scan tells half the story. The CBCT shows bone, nerves and roots; the iTero scan shows the surface of your teeth and gums in fine detail. Our planning software lines the two files up, matching the same teeth in both, so they overlap into a single 3D model of your mouth: bone and soft tissue together. Together, these images help us understand the available space and plan where your new tooth will go.
Step 4: We plan your new tooth first
Before planning the implant, we consider how the final crown, the visible tooth, should look and fit into your bite. Then we plan the implant beneath it, choosing its position, angle, depth and size to support the future tooth while accounting for your bone, the nerve, the sinus and nearby teeth.
You can ask questions and review the proposed treatment with us before surgery. We want you to understand not just what we are doing, but why.
Step 5: We create your custom surgical guide
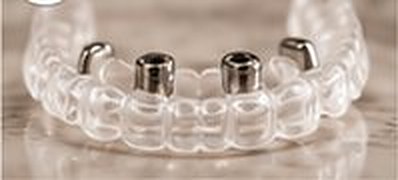
Once the digital plan is complete, a guide is made to fit your mouth. Built into it are small metal sleeves that, during surgery, help direct the instruments toward the planned implant position, angle and depth.
What happens on surgery day?
We numb the area with local anesthesia before treatment. After checking that the guide fits securely, we use it to help place the implant according to the plan. Depending on your individual needs, the procedure may involve a small opening in the gum, an incision, or additional steps such as bone grafting.
You may feel pressure during the procedure, but the area should be numb. Because the key decisions are made in advance, surgery is often more straightforward, and when a small opening in the gum is possible, many patients have less swelling and soreness afterward. We will explain what to expect and give you instructions for caring for the site afterward.
Healing and your final tooth
After placement, the implant gradually bonds with the surrounding bone. This healing period often takes several months, although timing differs from patient to patient. Once the implant is ready, we attach a custom crown designed to blend with your smile. Some patients may be candidates for a temporary tooth earlier in the process.
Guided vs. unguided (freehand) implant surgery
In freehand surgery, the implant is placed using the surgeon's skill and visual judgment during the procedure, often after opening the gum more widely to see the bone. Experienced surgeons place implants freehand every day, but a guide removes much of the guesswork. Here is how the two approaches compare:
| Guided surgery | Freehand surgery | |
|---|---|---|
| Planning | Implant position planned in 3D before surgery, from the final tooth backward | Position decided during surgery, from X-rays and what the surgeon sees |
| Accuracy | Guide sleeves help control position, angle and depth | Depends on the surgeon's eye and hand; more variation is possible |
| Nerves, sinus, roots | Distances measured in advance on the 3D plan | Estimated during surgery |
| Incision | Often a small opening in the gum, when appropriate | Often a larger incision to see the bone |
| Comfort afterward | Often less swelling and soreness when a small opening is used | Can involve more swelling and discomfort |
| Your involvement | You can see and review the plan before surgery | Less to review in advance |
| Preparation | Requires scans, planning and time to make the guide | No guide to wait for |
| Flexibility | Plan can be adjusted, and the dentist's judgment still applies during surgery | Surgeon can adapt freely during surgery |
Why we make guided surgery our standard
We believe every implant deserves thoughtful planning. Guided surgery helps us translate that planning into the procedure, with attention to the implant's position, the surrounding anatomy and the final restoration:
- Precision you can see beforehand. We plan where the implant will go before we begin, and we can show you the plan on screen.
- Respect for your anatomy. Measuring the distance to the nerve, sinus and neighboring roots in advance helps reduce the risk of getting too close to them.
- A gentler procedure, when possible. A smaller opening can mean less bleeding, less swelling and a more comfortable recovery.
- A natural-looking result. Because the plan starts with your final tooth, the implant is positioned to support a crown that looks and functions naturally.
- Predictability. Fewer surprises on surgery day means a calmer, more efficient visit for you.
Our goal is to provide precise, individualized care, not to rush treatment or promise that every case will be the same. Both dentists at Montgomery Greene Dental completed New York University's two-year implant training program, and we combine that training with modern digital tools to plan and carry out implant treatment.
Ready to learn more?
If you are missing a tooth or thinking about dental implants, we would be happy to explain your options. Call (201) 204-0737 or book a consultation online at Montgomery Greene Dental in Jersey City, NJ.
This article is for general education and is not individualized medical advice. Implant suitability, treatment steps, healing and results depend on an examination and imaging. Guided surgery supports precision but does not eliminate risk. Recovery and comfort vary from patient to patient. Images are illustrative.